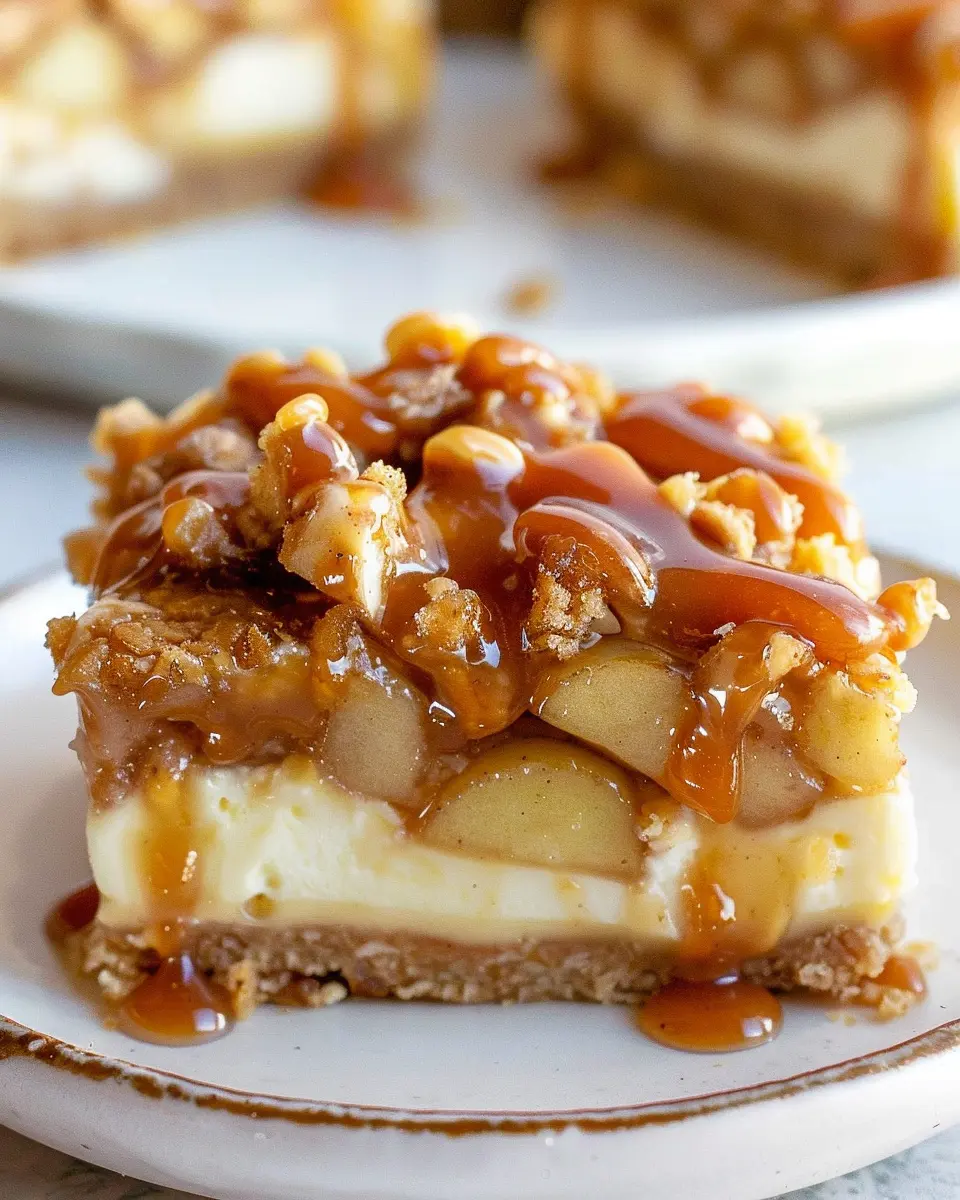
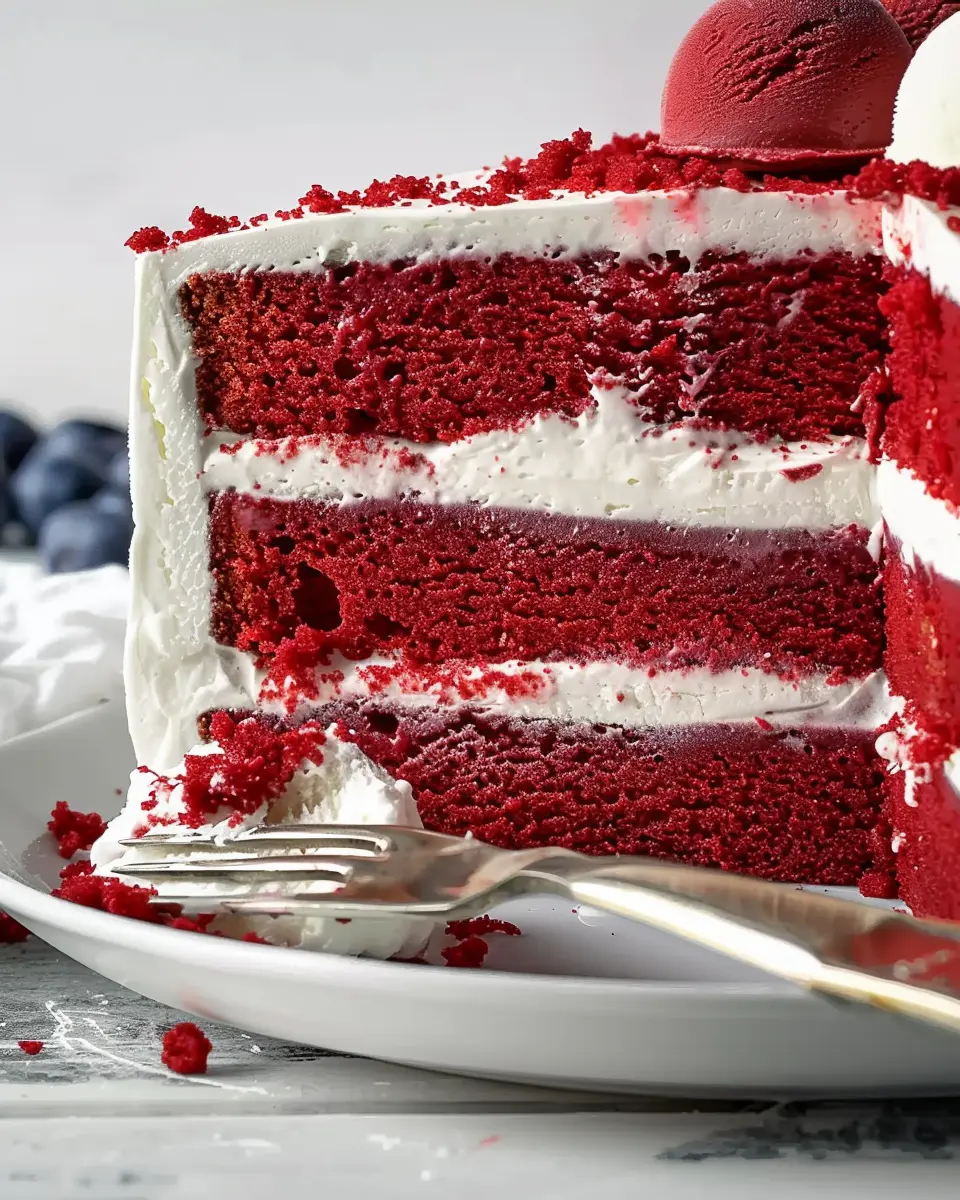
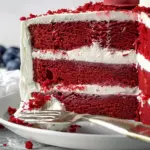
Introduction to Red Velvet Ice Cream Cake
Imagine biting into a slice of deliciously moist, velvety cake, and discovering that it’s not just any ordinary cake—it’s a dazzling fusion of red velvet cake and ice cream! This is where the magic truly begins, and let me tell you, it’s nothing short of spectacular. The combination of rich cocoa flavors with a hint of tang from cream cheese frosting, all swirled into a creamy ice cream base, creates an indulgent treat that’s perfect for any celebration, or even just a cozy night at home.
Why is red velvet cake so iconic? When you think of celebrations, red velvet often takes center stage. Its striking color and delightful texture make it the star of many special occasions, from birthdays to anniversaries. But when you take this classic cake and elevate it to the next level by transforming it into a red velvet ice cream cake, you’re not just making a dessert; you’re crafting a showstopper that’ll impress friends and family alike.
The Unique Blend of Flavors
What sets red velvet ice cream cake apart from traditional ice cream cakes is the unique blend of flavors. The rich cocoa flavor of the cake pairs beautifully with the creamy, luscious texture of the ice cream. To top it off, imagine a layer of creamy cream cheese frosting sprinkled throughout, delivering that signature tanginess in every bite. According to food experts, pairing contrasting flavors is key to achieving a balanced dessert, and this cake does just that.
How to Enjoy This Treat
The beauty of creating your own red velvet ice cream cake is the endless possibilities for customization. You can choose from various toppings, such as crushed nuts or berries, to add your personal touch. Plus, it’s an incredible dessert for any occasion, whether it’s a summer get-together or a cozy winter evening.
So, are you ready to take your baking skills up a notch? Let’s dive into this delicious recipe and discover how you can make your very own red velvet ice cream cake! For more inspiration on creating stunning desserts, you might want to check out American Cake Decorating for tips from industry experts.

Ingredients for Red Velvet Ice Cream Cake
Creating a decadent red velvet ice cream cake is easier than you might think! Here’s a handy list of ingredients broken down into two essential layers: the cake and the ice cream. Gather these before you dive into the mixing bowl!
List of Ingredients Needed for Cake and Ice Cream Layers
For the Red Velvet Cake:
- 2 cups all-purpose flour
- 1 ½ cups granulated sugar
- 1 teaspoon baking soda
- 1 teaspoon salt
- 1 tablespoon cocoa powder
- 1 cup vegetable oil
- 1 cup buttermilk, room temperature
- 2 large eggs
- 2 tablespoons red food coloring
- 1 teaspoon vanilla extract
- 1 teaspoon white vinegar
For the Ice Cream Layer:
- 4 cups vanilla ice cream (store-bought or homemade)
- Optional: ½ cup mini chocolate chips for added texture
This delightful combination of ingredients not only contributes to the incredible taste of your red velvet ice cream cake, but it promises that perfect creamy, decadent finish. Remember, the key is to use high-quality ingredients like fresh buttermilk and rich vanilla ice cream to elevate your dessert to gourmet status. For more inspiration on cakes, check out this ultimate cake guide. Do you have any favorite flavors that you’d like to try with red velvet?
Step-by-Step Preparation for Red Velvet Ice Cream Cake
Creating a red velvet ice cream cake combines two beloved desserts into one delightful treat that’s perfect for any occasion. With this detailed guide, you’ll find it’s easier than you might think. Let’s get started!
Prepare the oven and baking pans
Before doing anything else, preheat your oven to 350°F (175°C). A hot oven means even cooking for your red velvet cake! While it’s heating, grease and flour two 9-inch round cake pans. You can also line the bottoms with parchment paper for added protection against sticking. Why go through this hassle? It ensures that your cake layers come out perfectly and look beautiful when it’s time to assemble your red velvet ice cream cake.
Make the red velvet cake batter
In a large mixing bowl, cream together 1 cup of granulated sugar and ½ cup of softened butter until light and fluffy. This step not only adds sweetness but also heightens the cake’s texture. Next, mix in 2 large eggs, one at a time, ensuring each is fully incorporated before adding the next. Then add 1 tablespoon of vanilla extract and 2 tablespoons of red food coloring to get that iconic hue.
Combine dry ingredients with the wet ingredients
In another bowl, sift together 1 ½ cups of all-purpose flour, 1 tablespoon of unsweetened cocoa powder, and 1 teaspoon of baking soda. Don’t skip the sifting! This keeps your cake light and airy. Gradually add this dry mixture into the wet ingredients, alternating with 1 cup of buttermilk. Mixing these together will create a rich, vibrant batter that’s a feast for the eyes before it even hits the oven.
Fill pans and bake
Divide the batter evenly between the prepared pans and smooth the tops with a spatula. Pop them into the oven and bake for 25-30 minutes, or until a toothpick inserted in the center comes out clean. If you want some fun facts about baking times and techniques, check out this baking guide for tips from the experts.
Prepare the ice cream layer
While your cakes are baking, it’s time to think about that irresistible ice cream layer. You’ll need to soften 4 cups of your favorite vanilla ice cream (or a flavor that complements the red velvet). Allow it to sit at room temperature for about 15 minutes, then spread it evenly in a 9-inch round cake pan. Freeze it until solid, which typically takes about 1-2 hours. This layer is key in making your red velvet ice cream cake unique and enjoyable!
Make the frosting and gelatin mixture
For a luscious cream cheese frosting, blend together 8 ounces of cream cheese, ½ cup of unsalted butter, and 4 cups of powdered sugar. Add 1 teaspoon of vanilla extract for flavor. If you want a little stability to your frosting, dissolve a packet of gelatin in 2 tablespoons of cold water and then microwave it for 10 seconds to dissolve. Whisk the gelatin into your frosting for a more stable texture.
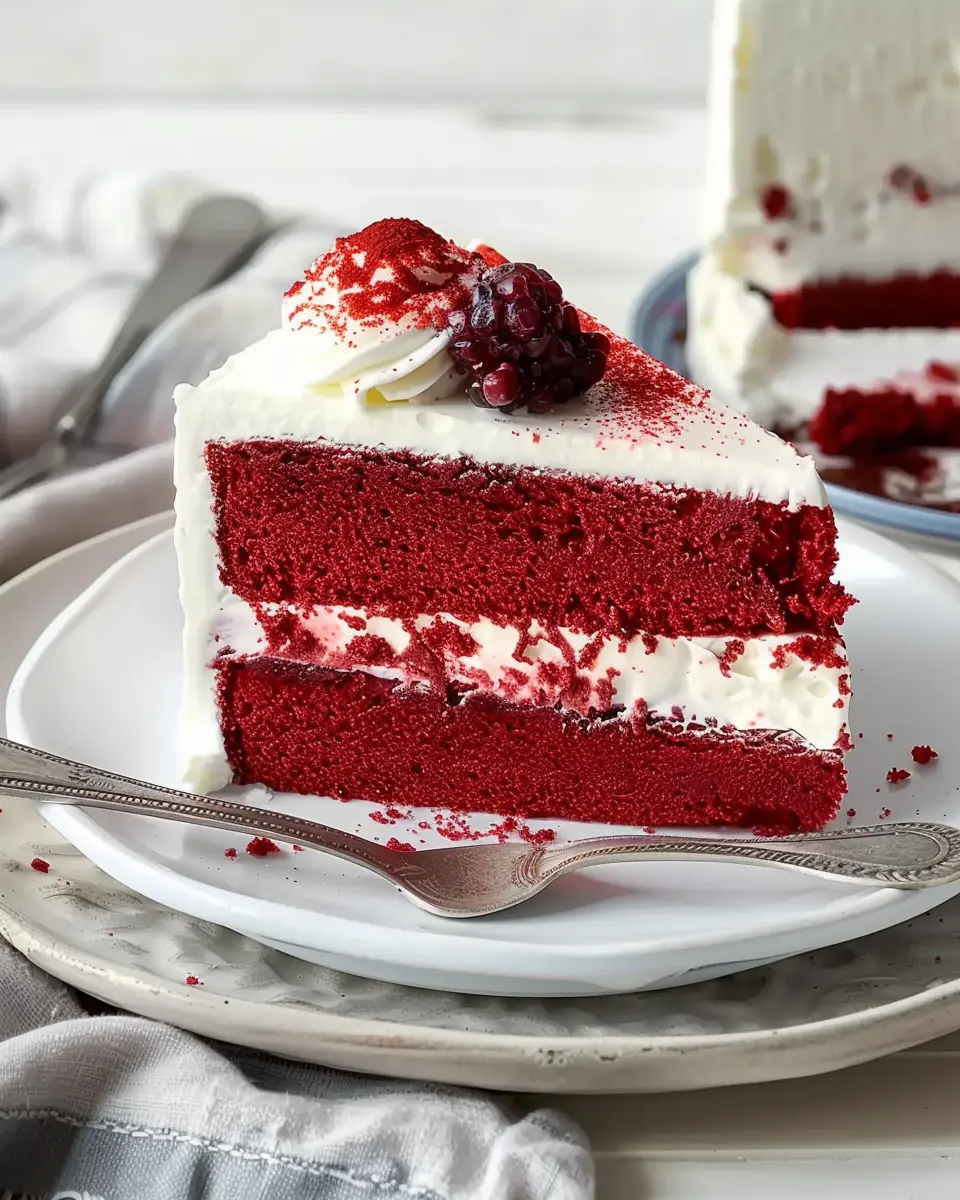
Assemble the cake layers
Once your cake layers have cooled completely, it’s assembly time! Place one cake layer on a serving plate and spread a generous layer of frosting on top. Carefully layer the frozen ice cream, followed by placing the second cake layer on top. Don’t be shy with the frosting—cover the sides and top of the cake beautifully, making it as decorative as you desire!
Freeze and set
Finally, it’s essential to freeze your assembled cake for at least 4 hours; overnight is even better. This ensures everything melds together and creates that incredible texture when you slice into your red velvet ice cream cake.
Once frozen, let it sit at room temperature for about 10 minutes before serving to make slicing easier. Cut into delightful wedges, serve, and watch everyone rave about your dessert masterpiece!
With this step-by-step preparation, you’re all set to create an unforgettable red velvet ice cream cake that’s sure to impress!
Variations on Red Velvet Ice Cream Cake
Delightful Fruit Toppings for Your Red Velvet Ice Cream Cake
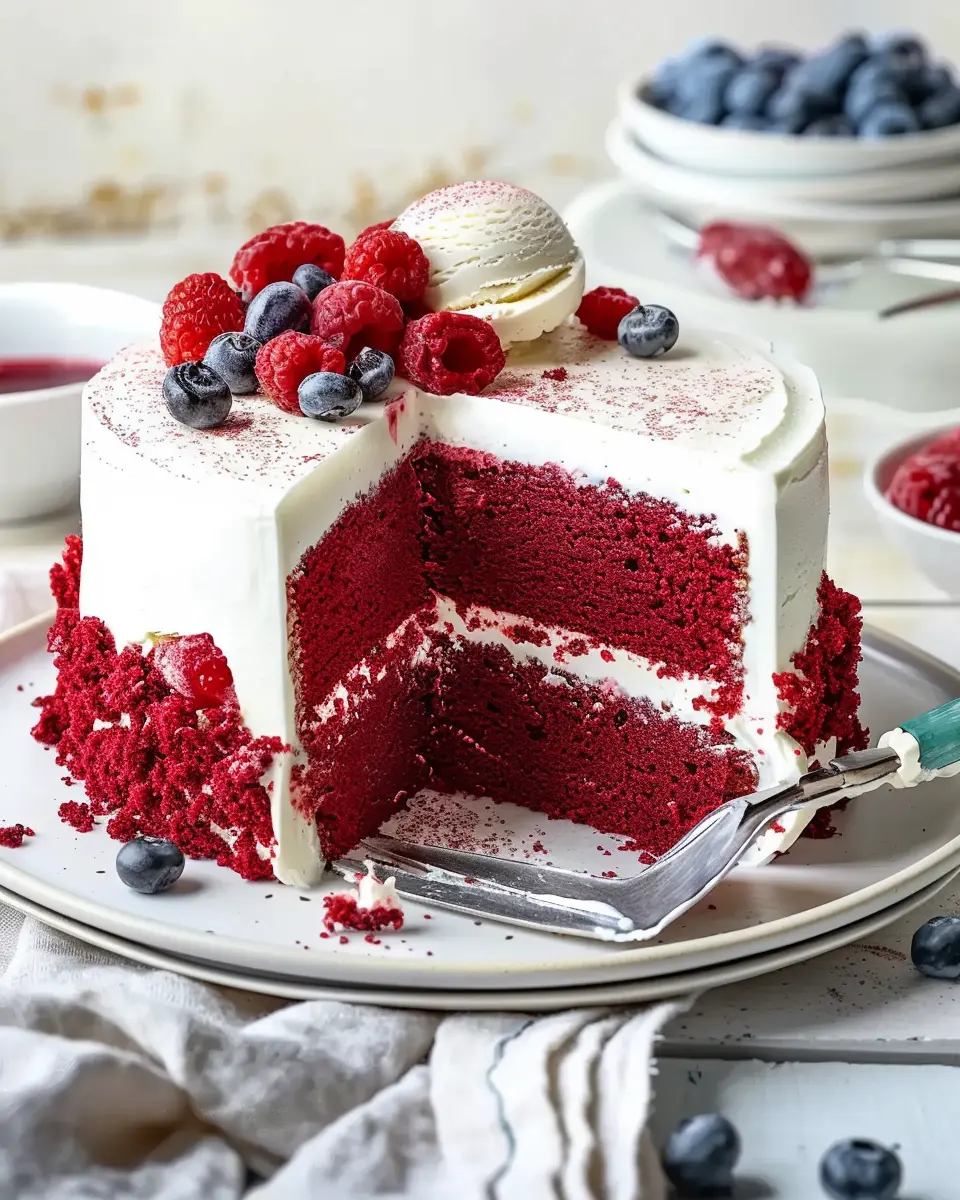
Elevate your red velvet ice cream cake by adding a burst of fresh flavors with fruit toppings. Not only do they provide a vibrant color contrast, but they also enhance the dessert’s taste profile. Consider using:
- Fresh Berries: Strawberries, raspberries, and blueberries add a tangy sweetness that beautifully balances the cake’s richness.
- Banana Slices: For a creamy texture, layer in some ripe banana slices—great for an indulgent twist!
- Cherries: A few juicy cherries on top can infuse a delightful tartness that complements the cake perfectly.
You can mix and match these toppings to personalize your cake. Want a bit of crunch? Add some crushed nuts or a sprinkle of coconut flakes. If you’re feeling adventurous, check out some easy fruit topping recipes here.
Gluten-Free Alternative for Red Velvet Ice Cream Cake Lovers
If you or someone you know follows a gluten-free diet, a delicious red velvet ice cream cake is still within reach! Simply substitute regular flour with a gluten-free blend. Many stores offer a variety of options that perform well in baking. Here’s what to know:
- Flour Choices: Look for blends that contain almond flour or coconut flour for an extra moist cake.
- Baking Time: Gluten-free cakes might bake a bit faster, so keep an eye on them towards the end to prevent overcooking.
You can also take a peek at this gluten-free baking guide for tips on achieving the ideal texture. Embrace these variations, because who doesn’t love a cake that suits every dietary need while still being a show-stopper?
Baking Notes for Red Velvet Ice Cream Cake
Common mistakes to avoid when baking
Making a red velvet ice cream cake can seem daunting, but it’s often the little things that trip us up. Here are a few common mistakes to steer clear of:
- Overmixing the batter: This can lead to a dense cake. Mix just enough to combine the ingredients.
- Incorrect oven temperature: Always preheat your oven! A fluctuation in temperature can drastically affect your cake’s rise and texture.
- Not cooling layers properly: Allow your cake layers to cool completely before stacking. This prevents melting the ice cream and ensures a clean cut.
Tips for perfecting the texture
For a stunning red velvet ice cream cake, texture is key. Here are some tried-and-true tips to help you get it just right:
- Use buttermilk: This not only gives flavor but also leads to a tender crumb.
- Cold ingredients: Make sure your ingredients (especially eggs) are at room temperature for an even mix.
- Layer your ice cream: For a delightful bite, use slightly softened ice cream to avoid large ice crystals. Try different flavors to surprise your taste buds.
By following these notes, you’ll ensure your red velvet ice cream cake is a showstopper at any gathering! For further baking tips, check out these expert tricks. Happy baking!
Serving Suggestions for Red Velvet Ice Cream Cake
Creative Presentation Ideas
When serving your red velvet ice cream cake, presentation is key to impressing your friends! Consider layering slices on individual dessert plates, garnished with a swirl of whipped cream and a sprinkle of cocoa powder or crushed red velvet cake crumbs. For an extra touch of elegance, place a few edible flowers around the plate or drizzle some raspberry sauce for a pop of color and flavor. You might even consider using a clear glass cake dome to showcase its beauty, allowing your guests to admire the layers before serving.
Pairing Suggestions for Beverages
The rich flavors of red velvet ice cream cake pair wonderfully with a variety of beverages. Serve it alongside a refreshing iced coffee or a creamy milkshake for a delightful combo. If you’re looking to balance the sweetness, try pairing it with a tangy lemonade or an herbal iced tea infused with mint. Each sip will enhance the delicious layers of your dessert and elevate your gathering to the next level. For more beverage pairing ideas, be sure to check out this resource on perfect drink pairings!
Remember, it’s all about creating a memorable experience! Enjoy the delightful evening with your loved ones and watch them be amazed by your red velvet ice cream cake.
Time Breakdown for Red Velvet Ice Cream Cake
When you’re ready to indulge in the delightful world of red velvet ice cream cake, knowing the time commitment helps you plan perfect moments. Here’s a simple breakdown:
Preparation time
You’ll need about 30 minutes to gather your ingredients and whip up that luscious cake batter. Mixing the ice cream takes a little extra time, as you’ll want it to soften just right.
Baking time
Baking the cake will take approximately 25-30 minutes. Make sure to check for that perfect doneness with a toothpick—a little trick I swear by!
Freezing time
Once baked, let your cake cool for about an hour before layering it with the ice cream—you’ll want to freeze it for at least 4 hours, so plan for this to ensure it’s well-set and ready to slice.
Total time
In total, you’re looking at around 5 hours, mostly from freezing. But it’s totally worth the wait for that indulgent, creamy slice of red velvet ice cream cake!
For more tips on getting the most out of your baking experience, visit Food Network for additional techniques and recipes. Enjoy making this delightful treat!
Nutritional Information for Red Velvet Ice Cream Cake
Calories per slice
Indulging in a slice of red velvet ice cream cake can be a delightful experience, but let’s keep it real—caloric intake matters! On average, each slice contains approximately 350 calories. While that may seem like a treat, it’s good to stay aware while enjoying your favorite dessert.
Breakdown of key nutrients
When you whip up this delicious cake, you’ll also be incorporating some essential nutrients:
- Fat: Around 20 grams, primarily from the cream and butter.
- Carbohydrates: Approximately 35 grams, giving you that energy boost.
- Protein: About 4 grams, courtesy of the eggs and dairy.
- Calcium: A nice source, thanks to the creamy ice cream.
As you savor your red velvet ice cream cake, remember that balance is vital. Consider pairing it with fresh fruit for added vitamins. If you want to dig deeper into the science of nutrition, resources like the USDA FoodData Central offer extensive nutritional breakdowns. Happy indulging!
FAQs about Red Velvet Ice Cream Cake
What flavor profile does red velvet cake have?
Red velvet cake boasts a unique combination of flavors that sets it apart from traditional cakes. With a subtle hint of cocoa, paired with a slightly tangy cream cheese or buttercream frosting, it creates a delightful balance. The cake’s moist texture and earthy undertones make each bite a rich experience, enhanced by the creaminess of the ice cream layers enveloping the cake. If you’re new to making red velvet, discover tips on creating the perfect base in this helpful guide.
How long does the cake last in the freezer?
When properly stored, your red velvet ice cream cake can last in the freezer for up to two months. To ensure optimal flavor and texture, wrap the cake tightly in plastic wrap and then in aluminum foil to prevent freezer burn. Label it with the date so you can keep track! When you’re ready to indulge, simply let it sit at room temperature for about 10-15 minutes before slicing.
How to slice a frozen ice cream cake for best results?
To achieve clean, even slices of your red velvet ice cream cake, follow these simple steps:
- Use a sharp knife warmed in hot water; this makes cutting through the layers effortless.
- Wipe the knife clean with a towel after each slice to maintain neat edges.
- For a classic look, aim for slices about 1-2 inches wide and serve them with dollops of extra frosting or a drizzle of chocolate sauce.
These little tricks will have your cake looking as stunning as it tastes, perfect for any celebration! If you have more questions or want inspiration for variations on this delicious dessert, check out our recipe FAQs.
Conclusion on Red Velvet Ice Cream Cake
Recap of Why This Dessert is a Must-Try
The red velvet ice cream cake is not just a dessert; it’s an experience. With its visually stunning layers and a blend of rich flavors, this cake invites everyone to indulge in a delightful treat. The combination of moist red velvet cake and creamy ice cream creates a harmonious balance that keeps your taste buds dancing.
For those special occasions or a sweet night in, this cake is a guaranteed crowd-pleaser. Plus, its striking appearance makes it the perfect centerpiece for any gathering. Why wait? Dive into the deliciousness of red velvet ice cream cake and create unforgettable memories. For additional inspiration, check out this guide for perfect complementary flavors and serving suggestions!
PrintRed Velvet Ice Cream Cake: The Best Indulgent Summer Treat
Indulge in the ultimate summer treat with this Red Velvet Ice Cream Cake, perfect for cooling off on hot days!
- Prep Time: 30 minutes
- Cook Time: 30 minutes
- Total Time: 2 hours
- Yield: 8 servings 1x
- Category: Dessert
- Method: Baking
- Cuisine: American
- Diet: Vegetarian
Ingredients
- 2 cups all-purpose flour
- 1 cup granulated sugar
- 1 cup buttermilk
- 1 cup vegetable oil
- 4 large eggs
- 2 tablespoons red food coloring
- 1 teaspoon vanilla extract
- 1 teaspoon baking soda
- 1 teaspoon vinegar
- 1 teaspoon salt
Instructions
- Preheat the oven to 350°F (175°C).
- In a large mixing bowl, combine flour, sugar, cocoa powder, baking soda, and salt.
- In another bowl, whisk together buttermilk, oil, eggs, food coloring, and vanilla.
- Blend the wet ingredients into the dry ingredients until smooth.
- Pour the batter into prepared cake pans and bake for 25-30 minutes.
- Allow cakes to cool completely before assembling.
- Spread one layer of cake with ice cream, add the second layer on top, and frost the entire cake.
- Freeze the assembled cake for at least 2 hours before serving.
Notes
- For a richer flavor, add melted white chocolate to the frosting.
- Use any flavor of ice cream to customize your cake.
Nutrition
- Serving Size: 1 slice
- Calories: 350
- Sugar: 25g
- Sodium: 300mg
- Fat: 18g
- Saturated Fat: 10g
- Unsaturated Fat: 5g
- Trans Fat: 0g
- Carbohydrates: 42g
- Fiber: 1g
- Protein: 5g
- Cholesterol: 80mg
Keywords: Red Velvet Ice Cream Cake, summer dessert, indulgent dessert