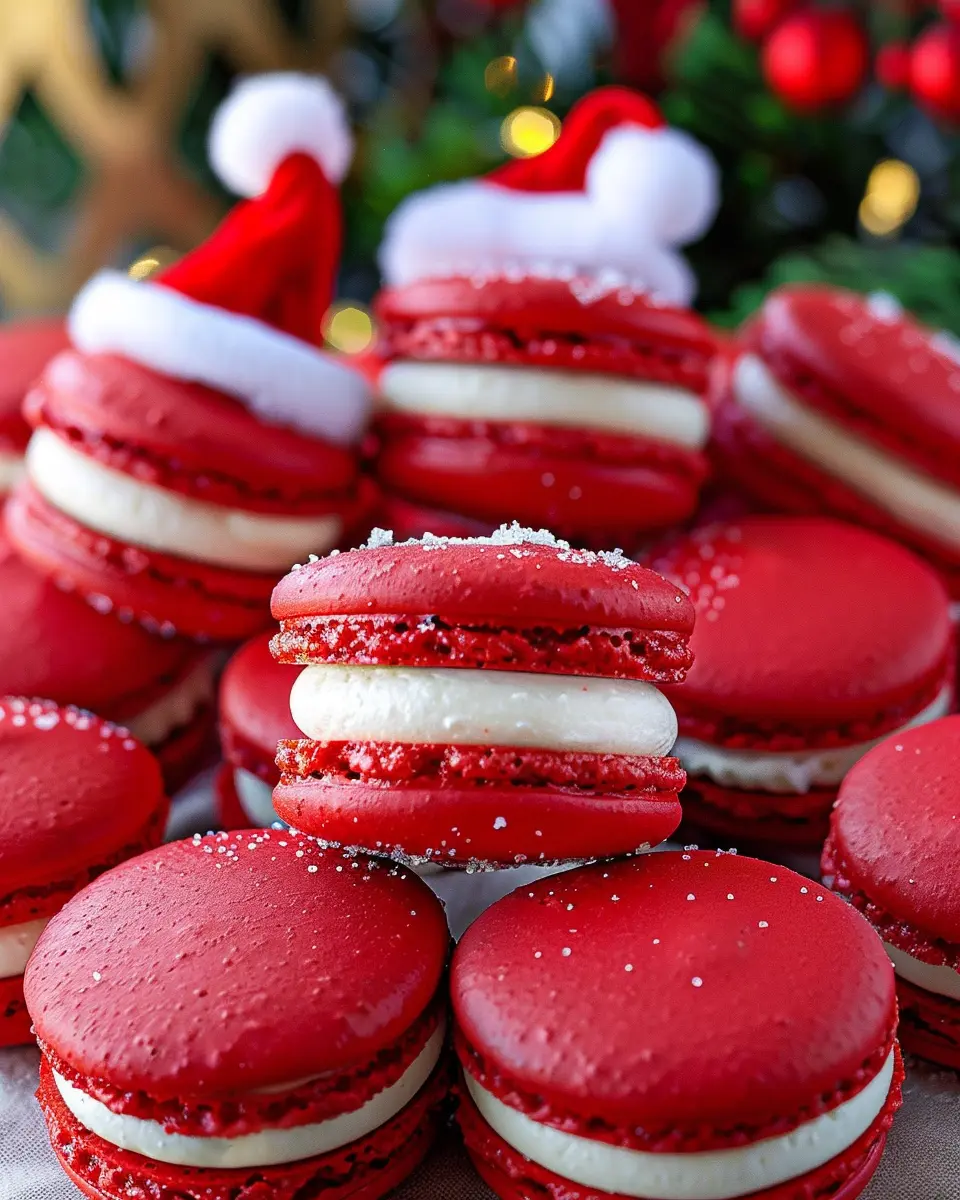

Introduction to the Best Red Velvet Cake
Red velvet cake is more than just a dessert; it’s an experience that brings joy, nostalgia, and a touch of elegance to any occasion. Have you ever wondered why this strikingly beautiful cake has captivated hearts worldwide? Let’s dive into the reasons behind its popularity.
Why Everyone Loves Red Velvet Cake
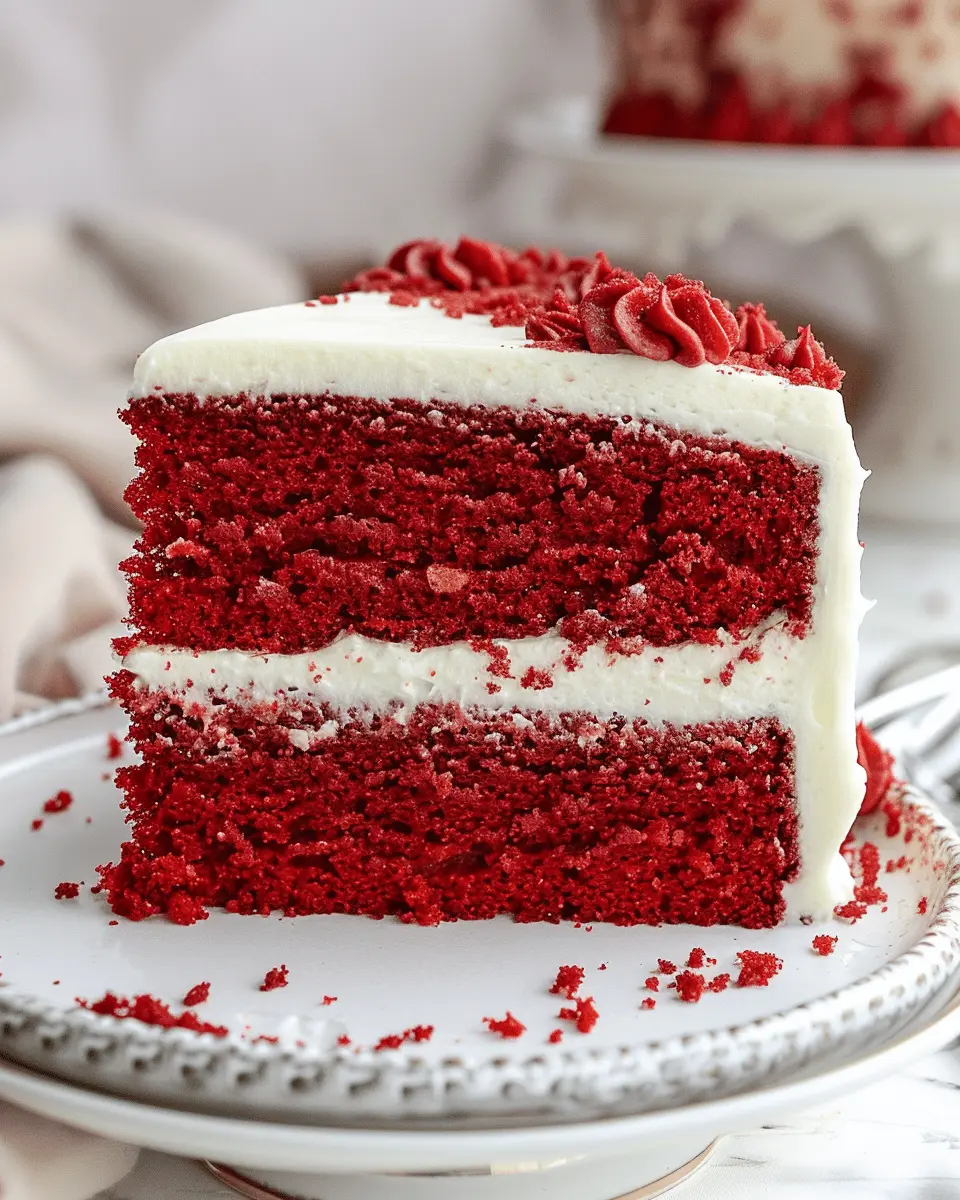
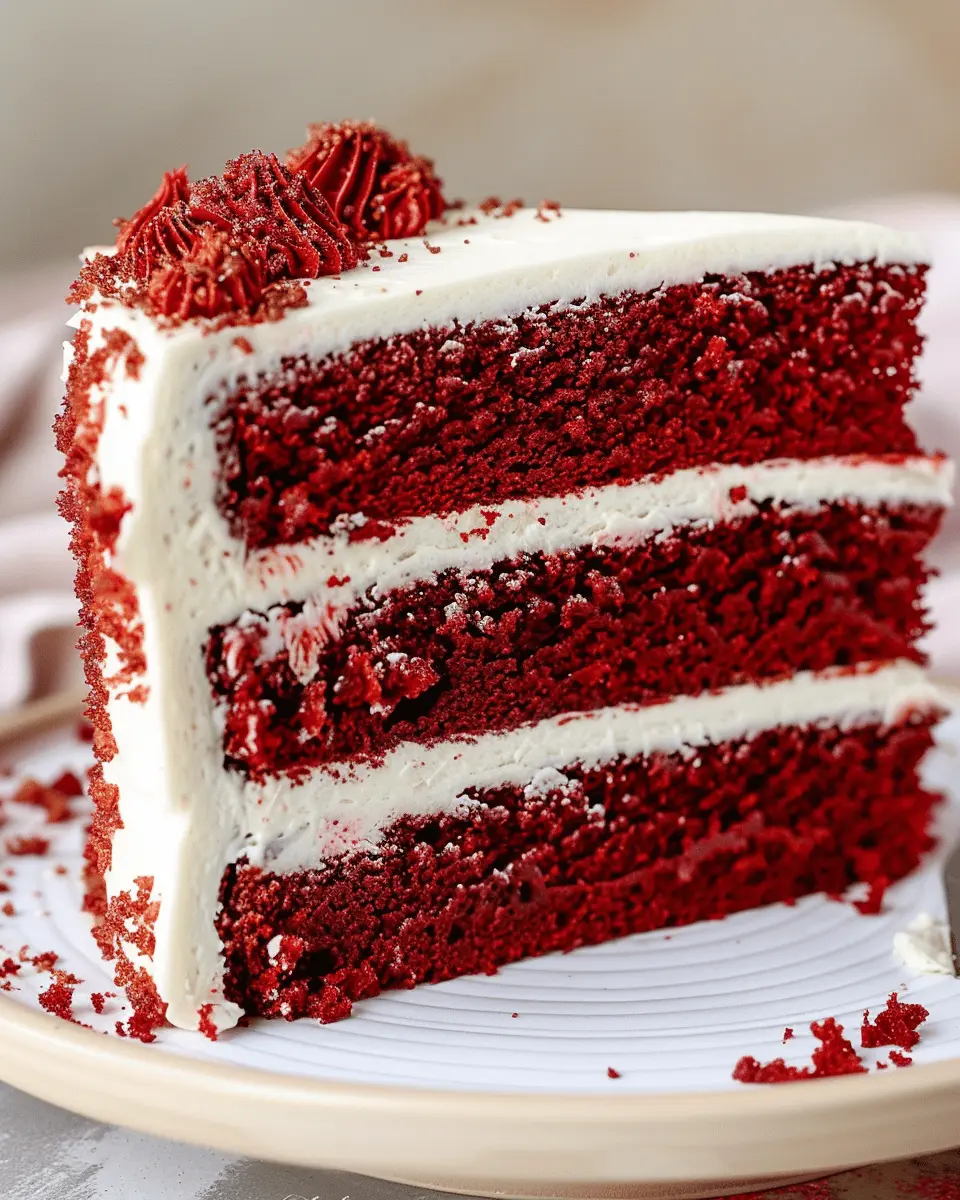
At first glance, the rich, crimson hue and velvety texture catch your eye and beckon you to take a slice. This cake is not just visually appealing—it also boasts a unique flavor profile that blends the slight tang of buttermilk with the sweetness of a traditional cake. This beautiful combination of flavors makes the best red velvet cake a delightful treat for both the taste buds and the eyes.
In addition to its appearance and taste, red velvet cake has deep roots in American history. Originating in the South, it has become a staple at celebrations and gatherings. As a young professional, don’t you want to add a piece of history to your next dinner party? You can learn more about red velvet’s evolution here.
The cake’s appeal also comes from its versatility. Whether served at a wedding, birthday party, or cozy get-together, the best red velvet cake can be dressed up or down with different frostings and fillings. Many people swear by cream cheese frosting as the perfect companion, while others advocate for a classic buttercream option. Curious to try different frostings? Check out this frosting guide.
Another reason this cake holds a special place in our hearts is the memories associated with baking and sharing it. Perhaps you’ve helped a family member prepare this cake for a holiday or had a slice at a café that made your day a little brighter. These experiences form lasting impressions that keep us coming back for more.
As you prepare to create your own masterpiece, remember that the best red velvet cake is not just about the ingredients but also the moments it fosters. Let’s get started on making your own delicious version that will surely impress!
Ingredients for the Best Red Velvet Cake
Creating the best red velvet cake starts with the right ingredients. Here’s what you’ll need:
Essential ingredients
- All-purpose flour: The foundation of your cake. Opt for high-quality, unbleached flour for the best texture.
- Granulated sugar: Adds sweetness and helps with the cake’s moistness.
- Cocoa powder: Use unsweetened cocoa powder to achieve that classic depth of flavor.
- Baking soda: This activates the cocoa and helps your cake rise beautifully.
- Vegetable oil: For moisture, giving your cake that tender crumb.
- Vinegar: It might sound odd, but this acidity balances the cocoa’s bitterness and enhances the color.
- Buttermilk: For that signature tang and moisture, which is essential for a perfect texture.
- Red food coloring: Don’t skimp on this for that iconic color!
- Eggs: For structure, richness, and binding.
Recommended tools and equipment
To whip up this delightful cake, have the following on hand:
- Mixing bowls: A set of different sizes will do.
- Electric mixer: This helps achieve the perfect fluffiness.
- Cake pans: Choose 9-inch round pans for even baking.
- Measuring cups and spoons: Accurate measurements are crucial for the flavor profile.
- Spatula: Ideal for folding and mixing without losing air.
- Cooling rack: Prevents soggy bottoms while cooling.
For detailed baking techniques, check out King Arthur Baking for reliable tips!
Having these ingredients and tools ready will lead you to that show-stopping best red velvet cake. Happy baking!
Step-by-Step Preparation of Red Velvet Cake
Making the best red velvet cake from scratch is a delightful and rewarding experience. Follow this step-by-step guide to create a colorful, luscious cake that’s perfect for any occasion. Let’s dive in!
Prepare the baking pans and preheat the oven
Before anything else, you’ll want to set the stage for your delicious masterpiece. Preheat your oven to 350°F (175°C). While that’s warming up, prepare your baking pans. For two 9-inch round cake pans, grease the bottoms and sides with butter or non-stick spray, then dust them lightly with flour. This will ensure your cake layers come out effortlessly when it’s time to remove them.
Sift and combine dry ingredients
Achieving the perfect texture begins with your dry ingredients. In a medium bowl, sift together:
- 2 ½ cups all-purpose flour
- 1 ½ cups granulated sugar
- 1 teaspoon baking soda
- 1 teaspoon salt
- 1 tablespoon unsweetened cocoa powder
Sifting these together not only helps to aerate the flour but also brings a lightness to the best red velvet cake. If you’re unsure why sifting is essential, check out this informative guide on baking basics.
Mix the wet ingredients to perfection
In another large mixing bowl, you’re going to create a harmonious blend of flavors. Combine:
- 1 ½ cups vegetable oil
- 1 cup buttermilk (if you don’t have buttermilk, make your own by mixing milk with a bit of vinegar)
- 2 large eggs
- 2 tablespoons red food coloring (this is where that vibrant color comes from)
- 1 teaspoon vanilla extract
- 1 teaspoon white vinegar
Use an electric mixer on medium speed until everything is well mixed. The swirling mixture should be smooth and slightly thick, setting the foundation for what will be an amazing cake.
Combine wet and dry ingredients for a smooth batter
Once your wet ingredients are ready, it’s time to bring everything together! Gradually add the dry mixture to the wet ingredients, mixing slowly. Start with a third of the dry ingredients, mixing until just combined, then add the next third, and so on, until you have a beautifully smooth batter. Be careful not to over-mix; you want that tender crumb that a best red velvet cake is known for.
Bake the cake layers until perfectly moist
Now comes the exciting part! Pour the batter evenly into your prepared pans. Bake for 25-30 minutes, or until a toothpick inserted in the center comes out clean. Don’t be tempted to open the oven door too soon, as that can cause your cake to fall.
Cool the cake layers before frosting
Once your cakes are out of the oven, let them sit in the pans for about 10 minutes. Then, carefully remove them and place them on a cooling rack. It is essential to let them cool completely before frosting, which usually takes about an hour. Patience will pay off!
Prepare the cream cheese frosting
While waiting, you can whip up a delectable cream cheese frosting that’s the perfect companion to your red velvet cake.
In a large bowl, beat together:
- 1 cup cream cheese (softened)
- 1/2 cup unsalted butter (softened)
- 4 cups powdered sugar
- 1 teaspoon vanilla extract
Mix on medium speed until fluffy and smooth. This frosting should have a rich consistency that you can easily spread over your cake layers.
There you have it! With these clearly defined steps, you’re well on your way to baking the best red velvet cake you’ve ever tasted. Remember, baking is as much about enjoyment as it is about technique, so have fun with it! If you’re looking for more baking tips and inspired recipes, be sure to explore your favorite culinary blogs or join baking communities online. Happy baking!
Variations on Red Velvet Cake
When it comes to the best red velvet cake, the classic version is undeniably delicious, but variations can add exciting twists and cater to different dietary preferences. Let’s explore some delightful options!
Red Velvet Cupcakes
If you’re looking for a fun and portable way to enjoy red velvet cake, why not whip up some red velvet cupcakes? These mini treats are perfect for parties or simply a sweet snack. Just follow your favorite recipe for red velvet, but pour the batter into cupcake liners instead of a cake pan. Top them with cream cheese frosting—or even a whipped mascarpone for a refreshing twist. Not only do they look adorable, but they also reduce portion control dilemmas! For an extra touch, consider adding sprinkles or chocolate shavings on top.
Vegan Red Velvet Cake
Craving that red velvet cake flavor without the eggs and dairy? A vegan red velvet cake can be just as rich and flavorful. Substitute ingredients like mashed bananas or applesauce for eggs and replace milk with almond or oat milk. You can achieve that signature color using beet juice or simply rely on high-quality cocoa powder. Check out resources like Jamie Oliver for tips on enhancing vegan desserts without compromising taste. Your friends won’t even believe it’s plant-based!
Gluten-Free Red Velvet Cake
For those on a gluten-free diet, you can still indulge in the deliciousness of red velvet cake. Using gluten-free all-purpose flour will yield fantastic results. Many brands now offer blends that mimic traditional flour, making it easier than ever to bake gluten-free. Just be sure to check the packaging for the right ratios! Adding a bit of xanthan gum can also improve texture, providing that beautifully moist cake we crave.
With these variations, you can enjoy the magic of red velvet cake without limitations!
Cooking Tips and Notes for Red Velvet Cake
Achieving the Perfect Color
To create the best red velvet cake, the vibrant red hue is essential. Use quality cocoa powder and a good red food coloring—gel or liquid will work, but gel tends to give a richer color. Start with a small amount and gradually increase until you achieve that stunning ruby shade. A common tip is to let the batter rest for 10 minutes before baking; this helps the color develop further.
For an eye-catching presentation, consider dusting a bit of cocoa powder alongside your cake’s frosting. It not only enhances the visual appeal but also adds a nice contrast between the layers.
Ensuring Even Baking
Even baking can be tricky, but a few simple steps make a difference. Make sure your oven is calibrated correctly; an oven thermometer can help you monitor the temperature accurately. Bake your cake layers in the center of the oven and rotate them halfway through to promote even heat distribution.
Also, use cake strips to keep the edges from getting too hot—this helps achieve that perfect dome shape without dry edges. If you’re interested in more baking techniques, check out professional baking tips from America’s Test Kitchen.
By following these tips, your best red velvet cake will surely impress your friends and family!

Serving Suggestions for Red Velvet Cake
Pairing with Beverages
When enjoying the best red velvet cake, consider elevating the experience with the right beverages. A delightful option is a classic cup of strong coffee or a smooth latte, which beautifully balances the cake’s sweetness. For a refreshing twist, serve it with freshly brewed hibiscus tea. The tartness complements the rich cocoa flavor, creating a harmonious taste sensation. If you’re looking for something non-caffeinated, a creamy vanilla milkshake can be the perfect match, providing a nostalgic flavor burst that pairs wonderfully with the cake.
Decorating Ideas for Special Occasions
Presenting the best red velvet cake doesn’t just end with baking—decorating it adds that special touch! For birthdays, think bright sprinkles or edible glitter for a festive vibe. For more formal gatherings, a simple cream cheese frosting swirled elegantly on top can elevate its sophistication. You might also layer it with fresh berries or edible flowers for a stunning visual. Remember, presentation enhances the overall enjoyment, so have fun with it!
For more creative ideas, check out this guide on cake decorating techniques that can help you unleash your inner artist.
Time Breakdown for Red Velvet Cake
When making the best red velvet cake, understanding the time commitment is essential for planning. Here’s a quick breakdown for you!
Preparation time
You’ll want to set aside about 20-30 minutes for preparation. This includes gathering your ingredients and mixing the batter. It’s a great time to enjoy some music or catch up on a podcast while you whip everything together.
Baking time
The baking process will take approximately 25-30 minutes. Keep an eye on your cake to ensure it rises perfectly. Use the toothpick test: if it comes out clean, you’re good to go!
Total time
In total, expect to spend about 1 hour from start to finish. After that, it’s all about letting your cake cool and getting ready to serve your delicious creation!
For some tips on perfecting your baking skills, consider checking out resources from the American Baking Guild or other reliable culinary sites that offer tons of baking wisdom!
Nutritional Facts for Red Velvet Cake
Understanding the nutritional profile of your favorite dessert, like the best red velvet cake, can enhance your baking experience. A typical slice contains approximately 350-400 calories, with the following macronutrient breakdown:
- Carbohydrates: 50-55g
- Fat: 15-20g
- Protein: 5-6g
This cake is a delightful treat, but if you’re looking to indulge a bit lighter, consider these tips for lighter variations:
- Substitute Greek yogurt for oil to reduce fat while adding protein.
- Use unsweetened applesauce in place of sugar for natural sweetness.
- Opt for whole wheat flour to boost fiber content.
For more in-depth nutritional information, check out resources like the USDA FoodData Central. Remember, balance is key—enjoy your cake and make small swaps to suit your dietary needs!
FAQs about Red Velvet Cake
When diving into the world of baking, especially when making the best red velvet cake, you might have some burning questions. Let’s tackle a few frequently asked questions to enhance your baking experience!
What makes red velvet cake different?
Red velvet cake stands out from other cakes due to its unique color, texture, and flavor profile. Traditionally, it boasts a beautiful red hue thanks to the use of cocoa powder and buttermilk, combined with a touch of vinegar. This chemical reaction intensifies the flavor and gives it that signature velvet-like texture. The cream cheese or buttercream frosting on top only enhances its appeal. A classic recipe can also be found on King Arthur Baking’s website.
Can I substitute ingredients?
Absolutely! Here are a few common substitutions:
- Buttermilk: If you don’t have buttermilk on hand, mix one cup of milk with a tablespoon of vinegar or lemon juice and let it sit for about 5 minutes.
- Butter: For a lighter cake, you can substitute with vegetable oil. This will keep the cake moist.
- Coloring: While red food coloring is traditional, you can also explore natural alternatives like beet juice, though the taste might differ slightly.
Feel free to experiment to create your own version of the best red velvet cake!
How do I store leftover red velvet cake?
Storing leftover red velvet cake is simple:
- Room Temperature: If you plan to eat it within a couple of days, cover it with plastic wrap or place it in an airtight container.
- Refrigeration: For longer storage, keep it in the fridge. Just remember to wrap it well to prevent it from drying out.
- Freezing: You can freeze slices for about 2 to 3 months. Just ensure they’re well-wrapped to preserve flavor.
With these tips, you can savor your delicious creation for days to come! Happy baking!
Conclusion on the Best Red Velvet Cake
Why You Should Try Making This Cake
If you’re looking to impress friends or simply indulge yourself, making the best red velvet cake is a must-do! The blend of chocolate and creamy frosting creates a flavor that’s both unique and nostalgic. Baking this cake allows you to customize it to your taste—perhaps adding a hint of spice or swapping frosting flavors.
Not only is it a showstopper at gatherings, but it also offers a delightful experience in the kitchen. Plus, making it from scratch can elevate your skills. So, why wait? Gather your ingredients and let this be the sweetest adventure you embark on today. For tips on baking basics, check out resources from The Kitchn.
PrintBest Red Velvet Cake Recipe: Indulge in a Decadent Delight

Indulge in the rich and velvety flavors of the best red velvet cake. This recipe will guide you through creating a moist, decadent dessert perfect for any occasion.
- Prep Time: 20 minutes
- Cook Time: 30 minutes
- Total Time: 50 minutes
- Yield: 12 servings 1x
- Category: Dessert
- Method: Baking
- Cuisine: American
Ingredients
- 2 cups all-purpose flour
- 1 ½ cups granulated sugar
- 1 teaspoon baking soda
- 1 teaspoon salt
- 1 teaspoon cocoa powder
- 1 ½ cups vegetable oil
- 1 cup buttermilk
- 2 large eggs
- 2 tablespoons red food coloring
- 1 teaspoon vanilla extract
- 1 teaspoon white vinegar
Instructions
- Preheat your oven to 350°F (175°C) and grease two round cake pans.
- In a large bowl, whisk together the flour, sugar, baking soda, salt, and cocoa powder.
- In another bowl, mix the vegetable oil, buttermilk, eggs, food coloring, vanilla extract, and vinegar until well combined.
- Gradually combine the dry ingredients with the wet ingredients until the batter is smooth.
- Pour the batter evenly into the prepared cake pans and bake for 25-30 minutes.
- Once baked, let the cakes cool for 10 minutes before transferring them to wire racks to cool completely.
Notes
- For a richer flavor, use cake flour instead of all-purpose flour.
- Top with cream cheese frosting for the best results.
Nutrition
- Serving Size: 1 slice
- Calories: 350
- Sugar: 26g
- Sodium: 200mg
- Fat: 15g
- Saturated Fat: 2g
- Unsaturated Fat: 10g
- Trans Fat: 0g
- Carbohydrates: 45g
- Fiber: 1g
- Protein: 4g
- Cholesterol: 40mg
Keywords: Best Red Velvet Cake, Red Velvet Recipe, Cake Recipe